Wednesday, August 4, 2021

My kind of fishing!


One of the projects I worked on as part of the 2021 APQ UFO Challenge was this little table runner.  My husband is a big fisherman so when I saw this pattern, I knew he would love it!  The pattern was one of those business card sized laminated patterns that are easy to find at many quilt shops.  They seem to call to me and are often an impulse purchase for me!  


It was all made with fabrics from my stash and I did the machine quilting as well.  I love projects like these.  Another UFO to cross off the list!  


Wednesday, June 16, 2021

A New Ruler Does the Trick

It's been an odd year to be sure. The universe gave me lots of time during quarantine to quilt, read, walk, and eat more than I really needed to eat.  I think a lot of my mood was attributed to a long bleak winter and missing seeing family and friends.  I did manage to get some quilting projects finished and mailed to their new owners as well of getting lots of face masks sewn.  I have a large lap quilt that is ready for the hand binding on the back and then that pretty much completes the larger projects on my list.  The majority of projects completed just needed making binding, adding binding to the front and then hand sewing the binding to the back of the item.

Binding has not been my favorite activity but I was determined to improve how I created the binding strips and joined them together.  

I also had several jelly rolls that were just waiting for a lightbulb moment.  One jelly roll had been opened so I could see the colors of the 40 strips.  They really called to me!  I wanted to make a jelly roll race quilt which I knew I could make in less than a day.  But I was not looking forward to drawing 45 degree lines on the ends of each strip in order to sew them together.  There had to be a better way.  I have been striving to learn a new technique with each new project when possible so I explored options.  Then I found the perfect solution when I was binge reading You Tube quilting sites!  I discovered a new ruler by Creative Grids called a Folded Corner Clipper designed by Susan Nelson.  


This ruler will cut corners from 1 inch to 5 inches.  Lots of tutorials are available on the web, just use your favorite search engine to find them.

The jelly roll race quilt used 40 strips which means 80 ends to connect.  The ruler made easy work of this task! 


This shows the placement of the ruler for cutting 2.5" strips.

Once cut, the 2 ends fit together like pieces of a puzzle.  Then sew.  Once the ends are connected, just keep adding the strips together to complete the top of the race quilt.  This took me less than 3 hours.  Here is the top I made.  It now needs borders, backing and binding and will finish to a 50" x 65" quilt top before borders.  I will definitely use my new ruler to make the binding strips as well.  


This is the top so far, it's a Robert Kaufman jelly roll in Vincent Van Gogh colors.  I have 2 more jelly rolls that are ready for racing as well!  Now to search my stash for backing and binding fabrics!  

Enjoy your day folks, do something quilty!  


Friday, August 2, 2019

Thinking inside the box(es)

I have not posted in a while due to a busy schedule of home improvement projects, family get-togethers, travels to OBX, and spending time at our cabin fishing for the big bass and tasty trout.  However, I have been able to chisel out some time for some quilt related activities.  I have a few quilts nearing completion but most of what I could do needed to be mobile projects that did not require a sewing machine and could be done at our mountain cabin.  

Some of the things that I worked on included sorting and culling down my magazine collection, sorting my boxes and bags of scraps, cutting the aforementioned scraps into shapes and sizes for future projects and hand quilting the bindings onto sandwiched quilts.  I also managed to sort my quilting tips, tricks and patterns that I have printed and clipped over the last 25 years or so into plastic sleeves and file them by category into binders. 

One of my favorite sizes that I cut my scraps into is 2.5 inch squares.  I use my Accuquilt die to cut the larger scrap pieces and rotary cutter to cut the smaller scrap pieces as a way to make the best use of the fabric.  I can cut 54 squares in one pass on my Accuquilt cutter which makes the task go by very quickly.  I cut a variety of shapes from my scraps but I will leave that topic for a future post.  

Since I have accumulated a large number of 2.5" squares, I decided to make a lap quilt from them.  I have made this pattern once before when I was finishing UFO projects in 2016.  You can see that quilt in my May 2016 list of quilts.  

I didn't use a commercial pattern for the quilt but decided to just wing it with the squares I had on hand and fabrics from my stash for the sashing, cornerstones, backing and binding.  The quilting was done by me on my Bernina 350.  The one now in progress will follow the same process.  

This is a very versatile pattern since it can be made in a variety of sizes by changing the number of blocks and/or altering the number and width of borders. 

This leads into the reason for the title of this post.  

My quilt uses 12 blocks containing 36 squares each.  Doing the math, that equals 432 squares that need to be managed.  Each block measures 15" before sewing.  I lay out each block on my Big Board as the squares are selected. 

 I don't have the room for a design wall but I needed to find a way to store the squares for each block so they remained together and in some semblance of order.  I looked at baskets and trays and plastic bags but nothing met my needs.  I looked for boxes that had compartments but none of them had the right size for storing the squares.  Then I visited a Container Store near my home and found the perfect storage system.  It has stackable plastic boxes that have 3" compartments, perfect for 2.5" squares. I chose boxes with 6 compartments and purchased 4 of them along with a coordinating cover for the top of the stack.  They were also reasonably priced!  

Each compartment is the perfect size to hold the 36 squares for each block.  My quilt will need 12 compartments, or 2 boxes.  I use another box for the sashing cornerstones and extra squares just in case. The top box is covered which is allows me to take it when I travel to our cabin.  The 4th box is for future use.  

So, you may have heard of wine in a box, I now have a quilt in a box!  The cost was less than $35 dollars.  These boxes are available on line as well.


These are called "Pure Boxes" and come in a variety of sizes and number of compartments.  An answer to my prayers!

Do something happy today!  


Tuesday, January 22, 2019

2019 - Filling the Bucket

It's been a few months since I posted anything here.  Life intervened with both good and bad stuff.  Good stuff included wonderful trips to Cape Hatteras in May (with family) and October (with just the Hubs).  Weather was good and fishing was productive on both trips.  We did not bring our Kirby dog on either trip as we had in the past 15 years.  He was getting too weary to do the trip so we left him with our vet in May where he did great.  On this trip we also celebrated an engagement of  two of the youngsters in our family group in Hatteras.  He dropped a knee on the edge of the shore - she said yes!

We also did not take Kirby for our two weeks in October but this, sadly, was because one weekend in early September while we were away for a short trip to Delaware, he went to sleep and crossed the Rainbow Bridge.  We are still in the process of adapting to life without him.

In addition, we lost a dear family member from complications of diabetes.  I requested some of his shirts to make a quilt from them for my sister-in-law.  I have not been able to look at them yet, but soon I will. He was a sweetheart and will be sorely missed.

Happiness returned in early December when a nephew tied the knot to a lovely new member of the family.  It was a cold and rainy day in a beautiful, historic church in Valley Forge. We had such a grand time with all the family, food, dancing and music!

The last black cloud of the year - hopefully the last - was a horrific cold that hit both me and my husband.  No fever or chills but a continuous cough that just would not quit!  For six weeks it would not quit!  Both of us visited medical experts who had waiting rooms full of folks with the same cough!  I finally was given a medication that eased the cough at night and helped me get more than 90 minutes of sleep per night.  I am not a very nice person when I lose that much sleep.  Finally, after 6 weeks, that dratted cough is gone.

2019 has arrived!  And so has my quilting mojo! 

I have several quilts nearing completion, but these are gifts so I can't publish them here just yet.  I have also been busy sorting and cutting scraps and organizing my quilting fabrics, precuts and books.  I did not finish some the UFO projects from the APQ list I thought I could get through.  I will work on them this year but I did not join the APQ UFO project this year.  At this point it does not give me the flexibility I need to work on my projects as needed with all of the other projects on my plate.  

One of the things I try to do with each project is learn something new, try a new technique, try a different type of quilting, learn how to use all the things my sewing machines can do.  I think I found a wonderful way to do this while working on my projects - a bucket list!  While reading the latest issue of the American Patchwork and Quilting magazine, I read an article describing a quilting bucket list.  This list is a checklist of 50 items to try.  I have already done 14 of them.  Of the 50 things to do on the list, 3 are to make a quilt of my choice.  I can think of a log cabin quilt, a tumbler quilt and a storm at sea quilt which could check those three boxes at some time in the future.  

So the 14 boxes that are already checked are 3, 4, 9, 11, 14, 15, 19, 26, 27, 35, 36, 37, 39, and 46.  To see what these numbers mean, or to print out your own quilting bucket list, go to allpeoplequilt.com/bucketlist.  

I will now select one or two bucket list items to work on while I work on my current projects and will report my progress in my next blog post, pictures will be included.  Until then, happy quilting!  

Wednesday, August 29, 2018

Little quilts, big lessons!


I have gotten into a routine of trying a new technique or learning something new with each quilt I make.  I started looking through my quilting projects both done and in-progress to decide which ones were ready for a blog post.  As I was starting to draft a blog post for each one, it dawned on me that they all had something in common - I tried something new on each one of them.  So I decided to do a post on the new or different techniques I tried on each one of them instead of focusing on the quilt themselves.  

I made a quilt for each of my brother's grands.   One of them liked "howls" or owls and the other little one did not have a preference but I found a kit from a local quilt shop that was just perfect for her.  

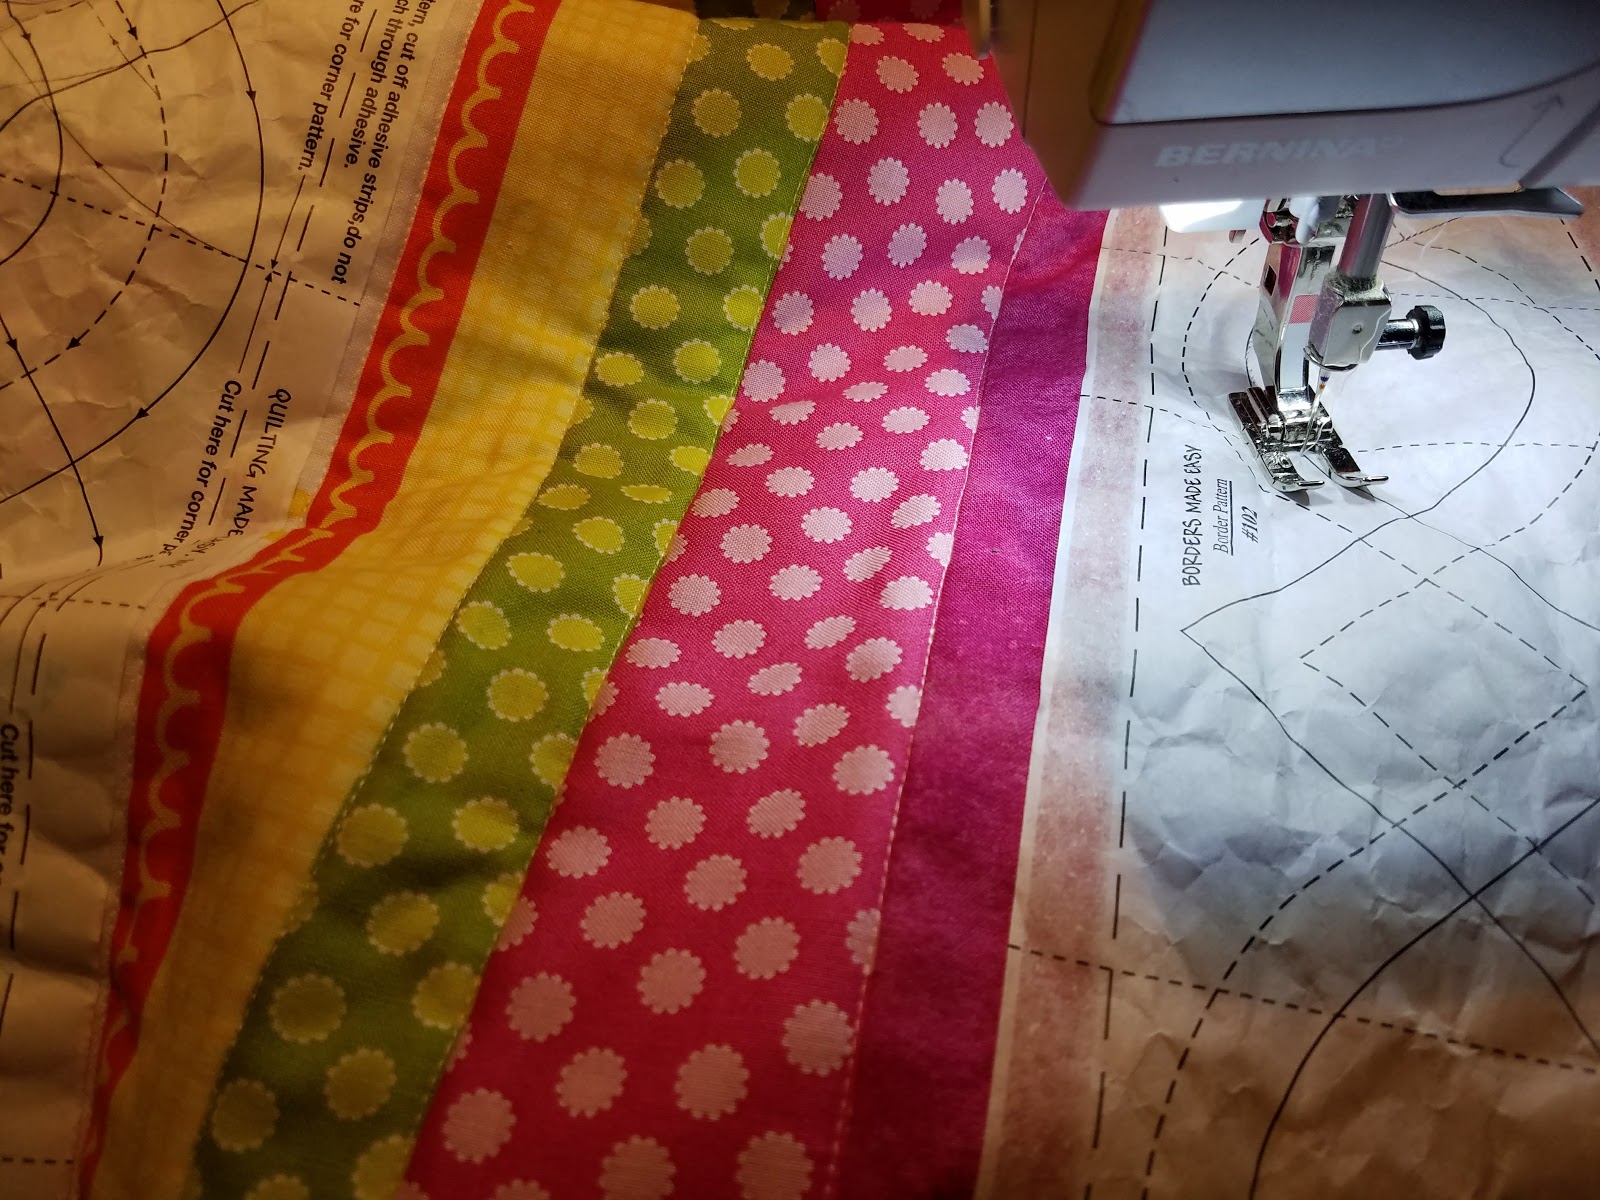
The  fabric I used for the "howls" quilt was a horizontal striped fabric that I could not bring myself to cut.  It made perfect sense to cut it down to size, add a border and call it a day.  However I wanted to add a bit of fancy work to the borders to counteract the linear look of the stripes.  One problem - I don't do free motion quilting.  But, I did have a roll of paper quilting pattern that is adhered to the fabric and used a guide for machine quilting!


This is called "Borders on a Roll".  You simply cut the size you need off the roll and adhere it to the border using the sticky edges of the paper.  It worked beautifully!  There are a variety of patterns to chose from as well.  This will be a technique I will use again and again!

Front of quilt
Backing fabric


The stripes on the front of the quilt were machine quilted above and below each of the divider bars.  I love how this quilt turned out!

The second lesson I learned was about using quilt labels.  I don't use labels on many of my quilts as others do, but on very special ones, I do.  I think my biggest fear is that the print on the label will run when the quilt is washed and as the last thing that is done prior to gifting the quilt, a ruined label will also ruin the quilt.  But I wanted to label this particular quilt.  We were invited to a birthday party to celebrate the 90th birthday of a very special lady named Rose.  I was at a loss as to what to give her as a gift and I knew I had less than a week to decide, but I ultimately chose to make a lap size quilt.  I found the perfect fabric in my stash and the count down clock started!  The quilt was made using the "tube method" which I will describe in the next lesson learned.  It went together very quickly.  The fabric used for the borders was a surprise find in my stash - all roses!  Once the quilt was finished, I decided to add a special label.  I knew I needed to practice to find the right words, the right ink and the right method of adhering the label to the quilt.  I found a printable frame on line and tested it with iron-on paper and several inks.  I finally found a combination that worked.  The quilt was completed on time and was loved by the lady for whom it was made!  I see more labels in my future!


The last lesson I want to tell you about is tube quilting!  This technique was used to make a quilt for the sister of the little lady who loved "howls".  As it turns out, I had a quilt kit in my stash that was just perfect for her.  It came with all the fabrics and the directions instructed me to cut strips from each of the appropriate fabrics and then sew them together to make a large strip set.  With the tube technique, the sewing is done first, then the cutting follows.  The sides of the strip set are then sewn to each other right sides together to make a tube.  The tube was then cut across the top of the strip set to create multiple loops.  In order to get the pattern to cascade, you need to find your friend Jack (the ripper).  A seam between a different fabric loop is then ripped to create a flat strip again.  These strips are then sewn to each other to create the quilt top with a cascading pattern.  Add borders and backing and the quilt is done.  

I love this technique (Rose's quilt was made using the same technique).  This method is more time friendly than sewing 64 blocks together!  You can find a similar pattern called Streaks of Sunshine on the quiltville.com website.  

Here's how the quilt front and backing turned out:


I hope you enjoyed reading about my adventures outside the box!  Comments, as always, are welcome!


Sunday, June 17, 2018

APQ 2018 April UFO


No blood was shed in the making of this table runner!

This is another UFO that is now a FO!  I started this runner in a quilting class at the Quilter's Barn in Allentown, NJ, which is no longer in business.  I was very sad when they closed.  I loved taking classes there because I made many new friends, I learned new techniques and tips about quilting.  Oh, I did find new shops where I can spend my dollars and take classes, but as the saying goes, you never forget your first.

So this class was taken in 1996.  I was a fairly new quilter back then but I do remember that I liked this class because I was scared silly to sew squares on point and this was the perfect project to cure me of that fear.  I finished the top center with the squares on point while in the class, but as often happened with class projects, once it left the classroom, it was put in a bag, box or bin never to be seen again.  I have gotten much somewhat better since then but there is now a spiral runner that comes to mind!

I added this to my UFO list to finish in 2018 with all expectations of completing it.  It was a smaller project, I had all the supplies on hand, I was getting better at quilting my own smaller projects, I also learned the joys of spray basting!  I don't know what I will do with the thousands of bent safety pins I have collected over the years, but I will find something creative on Pinterest I am sure!

Finishing the top required adding the little yellow border and the wider print border, all straight stitching.  Then the top was sandwiched with the batting and backing with the basting spray.  Lastly, I made the 2.5" binding and attached it to the front of the runner with a .25" seam.


I had purchased a sizeable amount of Clover clips over the years but still used straight pins to hold down the binding on the back side of the project.  They worked great but I routinely pierced my hands and snagged other fabrics before the hand sewing of the binding was done.  This meant blood and band-aids were part of my quilting practices.  This time, I put away the pins and grabbed the clips.  My binding habit was to pin (or this case, clip) the binding down on all four sides before starting the hand sewing.  See the result below - no pins, no piercing, no snags!  This technique is certainly a do-over!  This dog learned a lot of new tricks with this small project!


I try to use each class project, including those hanging around for 22 years, as a learning experience.  So here is what I learned from this one: 
  • If at all possible, purchase all the fabrics you will need to complete a project.  Of course this could be costly if your project is a king sized quilt, but when possible, get enough to at least make the borders and binding.  I bought all the fabrics for the borders and backing and even the binding for this runner, and I was glad I did.
  • Learn a new technique that will reduce your time sewing, machine quilting or binding your project.  
  • It's ok to leave a project unfinished but keep them together in a labelled box or bin.  If you decide you don't intend to finish it, recycle the fabrics into another project such as a scrap quilt.  Some guilds will also take UFO fabrics.  After all, it will give you more room for new fabrics and the UFO fabrics will be put to another good purpose.  All will be well in the quilting universe!  
May all your needles be sharp and your bobbins be full! 


Friday, May 4, 2018

APQ 2018 March UFO

Even though the number selections for the APQ UFO challenge for 2018 are totally random, I seem to be on a holiday themed run and this month was no different.  This is a Halloween project that was started in mid 2006.  It was a little kit I picked up during the annual NJ Shop Hop.  The pattern was provided in the kit which was the primary attraction for me.  Once I opened the kit, I saw that the fabrics were all Halloween themed which was ok in my book.  The kit also included the fabric for the top, borders, and binding.  I just needed to add the backing fabric.

The pattern name was "Frame Up" and was one of the little laminated cards you often find near the cash register in many shops.  I liked that it was a simple project and I that I could shop at local quilt shops.  This one was in Ocean City NJ and unfortunately, closed over a decade ago.


The project was easy to assemble with the fabrics provided.  I used a small piece of backing fabric from my stash to back the runner.   I used double sided fusible batting to sandwich the fabrics since it was a smaller project.   I machine quilted it using my walking foot with a quilting arm to make the stitching widths consistent.  I took the opportunity to practice my machine binding with a decorative stitch rather than hand sew the binding down.  I like using smaller projects like this to practice some techniques that I otherwise can't do on larger projects.  This runner finished at 14.5" x 36".  I look forward to using this Halloween runner in a few months.  The pattern is very small but will certainly make a big impact in some of my stash fabrics for other holidays!  


Can you guess what UFO project for April was chosen???


Tuesday, April 17, 2018

APQ 2018 February UFO

I decided to do the 2018 UFO Challenge this year.  I did this challenge in 2016 and finished 12 UFO projects.  It felt really good to get those projects off my plate.  I had a busy schedule planned for 2017 and did not continue the challenge.  At the end of 2017, I organized my sewing areas and found a few lot of unfinished projects that would work well for the UFO challenge and so it started.

The January UFO was actually the quilt I started for my sister (Sister's Surprise).  I wanted the post to be more about my sister rather than the challenge so it is identified that way.  It was already started so it was my newest UFO but a UFO nonetheless.  My next eleven UFO posts will be identified that way.  This is what I finished for February.

When I assembled the next eleven projects for the challenge, I just listed them on the challenge form in no particular order.  The number is drawn on the first of each month and I pull that project from the pile.  In February, the number chosen was # 9, a floral table runner that I started in a class in May of 2002 - yes, 2002.  The pattern used in the class was for the Waterwheel Tablerunner.  My favorite colors of the time were pinks and greens.  Working on this project again after all those years really brought me back in time!  I was really happy to finish this one and use it on my dining room table.  It brings a touch of spring to this room!


Pattern

Runner 77" x 22"

Rosebud backing fabric

Waterwheel block

 This was a great project, especially since it is 77 inches long!


Saturday, March 24, 2018

Sister's Surprise


One of the quilts I had on my list of things to do was a quilt for my sister.  I did make a lap quilt for her many years ago as well as some table runners and table toppers within the last three years or so for her new home but this one was a larger size.

On a recent visit to my home, she used a quilt I keep in our family room which is a great size when watching TV on chilly nights.  She loved the size!  It is bigger than a lap quilt but smaller than a bed quilt.  I already knew her favorite colors so now that I knew what size would work I started formulating a quilt design in my head.  I found a pattern on the Missouri Star Quilt Company's website that had just published a tutorial for it.

This quilt was made with precuts, also from Missouri Star Quilt Company.  I have grown very fond of precuts and have a few many charm packs, jelly rolls and layer cakes from there.  This particular quilt was made from two layer cakes, one all white and one of many patterns in blue (Annabelle by Windam Fabrics).  I used yardage from the same line for the border and Charlotte by Kensington Studios for the  backing.

The HST blocks were made from one of the blue layer cake squares and one of the white layer cake squares.  This produced 8 HSTs when the squares were placed right sides together and then sewn around all four sides with a 1/4" seam.  Then the unit was cut from corner to corner and in half from side to side and top to bottom.  I love this method!  The blocks were pressed to the dark side and squared up to 6.5 inches using my Bloc_Loc ruler.  This ruler makes squaring up so easy!


Layout of squares
Testing border fabric
Testing double borders
Having lots of space to layout the quilt is a big help when chain piecing.  One mistake here could result in lots of unstitching!  Ask me how I know!  I was in a quandary about the border or borders.  I finally decided on a single border and would plan on using the white yardage to make the binding.  As is my usual practice, I made the binding once the borders were added so everything was ready after the quilting was finished.

At this point my sister did not know I was making this quilt for her.  But now it was time to get the quilting done.  This was the one thing I wanted her pick so I took her to the quilt shop where the quilting would be done and surprised her with the quilt.  She picked out a beautiful pattern!  I showed her the binding I planned to add but she wanted a bit more color in the binding.  When I showed her several samples of flange binding, she made her decision.  It did make a beautiful finish to the quilt and I was able to bind by machine this time rather than hand sew the binding down.

Quilt backing
Flange binding

This is the finished quilt after being hand delivered to my sister in mid-March.  She loved it and I am sure it will be put to good use!  I love this pattern and I am sure more quilts will be made using it!


My revised blog is almost up to date with finished projects.  I have a few more posts to make which will be done within a few weeks.  Then on to some new projects.  Stay tuned!


Sunday, March 11, 2018

Binding at the Beach

I realize it is still winter with snow on the ground and more predicted (at least where I live) but this is actually a catch-up post for the first of 3 quilts I finished up last October.  My blog was undergoing renovations so I delayed posting anything until the blog was back up and running.  So this posting will share memories of binding 3 quilts while my husband and I were on our annual fall Cape Hatteras vacation.  I was busy that fall making a large quilt for my sister-in-law to celebrate her retirement from the Virginia Beach school system.  If our schedules mesh, we stop by my brother and sister-in-law's house on our return trip from Hatteras back to NJ.  I also made toddler quilts for their 2 grand daughters.  It was my plan to have all of them completed so they could be dropped off during our visit.

The pressure was on!

The quilt for my SIL was well underway prior to our vacation trip.  The pattern was similar to the Super Simple Squares pattern on the Missouri Star Quilt Company (MSQC) website.  Check out the tutorial for this quilt.  I used a layer cake from my stash and cut it into quarters to make charm squares.  I used a solid ecru fabric, also from my stash, to cut the cornerstone blocks and the sashing.  The backing was also from my stash.  The quilt ended up being 70" by 82" when completed.  The quilting was done by the wonderful folks at the Old City Quilts shop.  While waiting for the quilting to be completed, I made the binding and had it ready to travel!

While the Hubs was fishing, I made myself comfortable in the cab of our truck.  I had nice music and beautiful ocean views which provided a very calming background for sewing down the binding.  I love using the Wonder Clips instead of pins on the binding.  No blood shed here!

You can see the circular quilting in the picture below.  I thought the circular stitching was a nice contrast to the square blocks and linear sashing.


The picture below was taken at the headquarters for Cape Hatteras State Park.  Lots of cars stopped to see the photo shoot!  One little sneaky critter watched us from behind the sign in front of the flag.  I did not notice him until I was looking at the pictures full size.  See the sweet little deer face?


I will post pictures and details of the two toddler quilts in the next post.  Thanks for reading chapter 1 of this story!  


Thursday, February 22, 2018

Farmer's Wife Quilt - Update 1

It's been a while since I updated the status of this project.  My original post is dated 2/10/2015 so maybe "a while" is a relative term.  I did choose the accurate title for that post - "My Intentional UFO" - it still holds true today!  You can see that post here.

I decided that in 2018 I was ready for a project that I could work on for an extended period of time as my schedule allowed, and had no deadlines or pressure to finish.  I wanted something that I would enjoy doing and that would teach me new quilting techniques or refresh ones I had not done in a while.  The project chosen in 2015 was still a good choice in 2018.  As indicated in my original post, I already purchased the book for The Farmer's Wife Sampler Quilt and started choosing blocks and fabrics that I would use so I just picked up from where that project left off.

I did decide against using the 30s fabrics as originally chosen though.  I eventually chose the "Simply Harvest" line of fabrics by Marcus fabrics.  I will also use some Moda Marble solids with this fabrics to add a bit of variety since there are 111 blocks in this project.


My original post may have mentioned that I joined a Face Book page called Farmer's Wife Quilt Revival Class 2018. It was started by Karen Walker.  The purpose of the page is to provide a way to make this sampler quilt using rotary cutter techniques.  It has been a wealth of information, support and inspiration.  Karen has created 12 classes for this sampler quilt which explain a variety of techniques to make the blocks.  The classes are available for purchase and I have found them extremely helpful.  

So, I have completed 8 blocks so far.  I am a bit off my original schedule of 2 blocks per week but I had several projects to complete and my blog was getting a much needed makeover!  I didn't want to add anything to the older blog while it was undergoing the revisions.  My new blog now has a separate page where I can list all the blocks and the order in which I will hope to make them.  You can see this new page in my navigation bar.  Here are my first 8 blocks.


Taking pictures really helps to point out mistakes!  My broken dishes block had an oops in the bottom left corner!  I quickly fixed this before it was sewn together!   


 Now, it's ready to sew!  I love the design boards that I used to move my blocks from cutting board to sewing machine to ironing board.  I learned to make these from a tutorial I saw on the Fat Quarter Shop YouTube page. They are very easy to make and make the blocks in progress very portable!  

I hope to have several blocks cut in the next 2 weeks.  Watch for the next update!