Tuesday, January 22, 2019

2019 - Filling the Bucket

It's been a few months since I posted anything here.  Life intervened with both good and bad stuff.  Good stuff included wonderful trips to Cape Hatteras in May (with family) and October (with just the Hubs).  Weather was good and fishing was productive on both trips.  We did not bring our Kirby dog on either trip as we had in the past 15 years.  He was getting too weary to do the trip so we left him with our vet in May where he did great.  On this trip we also celebrated an engagement of  two of the youngsters in our family group in Hatteras.  He dropped a knee on the edge of the shore - she said yes!

We also did not take Kirby for our two weeks in October but this, sadly, was because one weekend in early September while we were away for a short trip to Delaware, he went to sleep and crossed the Rainbow Bridge.  We are still in the process of adapting to life without him.

In addition, we lost a dear family member from complications of diabetes.  I requested some of his shirts to make a quilt from them for my sister-in-law.  I have not been able to look at them yet, but soon I will. He was a sweetheart and will be sorely missed.

Happiness returned in early December when a nephew tied the knot to a lovely new member of the family.  It was a cold and rainy day in a beautiful, historic church in Valley Forge. We had such a grand time with all the family, food, dancing and music!

The last black cloud of the year - hopefully the last - was a horrific cold that hit both me and my husband.  No fever or chills but a continuous cough that just would not quit!  For six weeks it would not quit!  Both of us visited medical experts who had waiting rooms full of folks with the same cough!  I finally was given a medication that eased the cough at night and helped me get more than 90 minutes of sleep per night.  I am not a very nice person when I lose that much sleep.  Finally, after 6 weeks, that dratted cough is gone.

2019 has arrived!  And so has my quilting mojo! 

I have several quilts nearing completion, but these are gifts so I can't publish them here just yet.  I have also been busy sorting and cutting scraps and organizing my quilting fabrics, precuts and books.  I did not finish some the UFO projects from the APQ list I thought I could get through.  I will work on them this year but I did not join the APQ UFO project this year.  At this point it does not give me the flexibility I need to work on my projects as needed with all of the other projects on my plate.  

One of the things I try to do with each project is learn something new, try a new technique, try a different type of quilting, learn how to use all the things my sewing machines can do.  I think I found a wonderful way to do this while working on my projects - a bucket list!  While reading the latest issue of the American Patchwork and Quilting magazine, I read an article describing a quilting bucket list.  This list is a checklist of 50 items to try.  I have already done 14 of them.  Of the 50 things to do on the list, 3 are to make a quilt of my choice.  I can think of a log cabin quilt, a tumbler quilt and a storm at sea quilt which could check those three boxes at some time in the future.  

So the 14 boxes that are already checked are 3, 4, 9, 11, 14, 15, 19, 26, 27, 35, 36, 37, 39, and 46.  To see what these numbers mean, or to print out your own quilting bucket list, go to allpeoplequilt.com/bucketlist.  

I will now select one or two bucket list items to work on while I work on my current projects and will report my progress in my next blog post, pictures will be included.  Until then, happy quilting!  

Wednesday, August 29, 2018

Little quilts, big lessons!


I have gotten into a routine of trying a new technique or learning something new with each quilt I make.  I started looking through my quilting projects both done and in-progress to decide which ones were ready for a blog post.  As I was starting to draft a blog post for each one, it dawned on me that they all had something in common - I tried something new on each one of them.  So I decided to do a post on the new or different techniques I tried on each one of them instead of focusing on the quilt themselves.  

I made a quilt for each of my brother's grands.   One of them liked "howls" or owls and the other little one did not have a preference but I found a kit from a local quilt shop that was just perfect for her.  

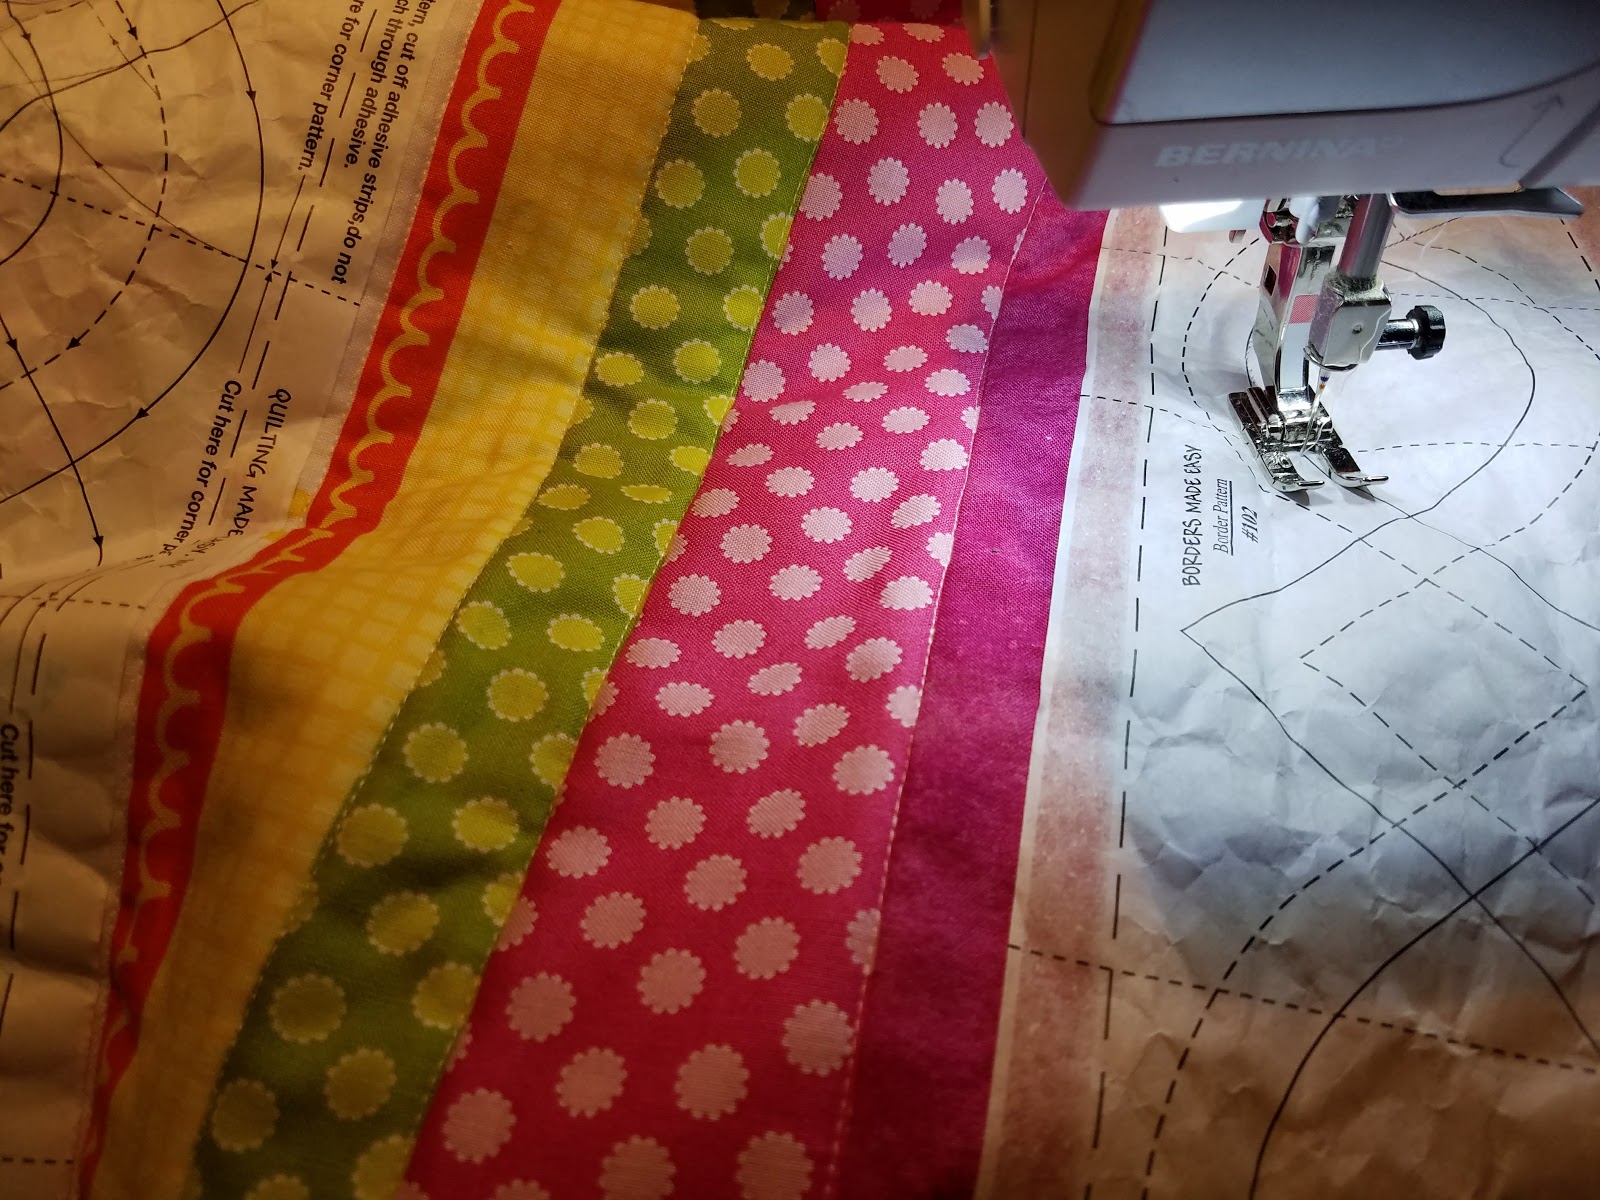
The  fabric I used for the "howls" quilt was a horizontal striped fabric that I could not bring myself to cut.  It made perfect sense to cut it down to size, add a border and call it a day.  However I wanted to add a bit of fancy work to the borders to counteract the linear look of the stripes.  One problem - I don't do free motion quilting.  But, I did have a roll of paper quilting pattern that is adhered to the fabric and used a guide for machine quilting!


This is called "Borders on a Roll".  You simply cut the size you need off the roll and adhere it to the border using the sticky edges of the paper.  It worked beautifully!  There are a variety of patterns to chose from as well.  This will be a technique I will use again and again!

Front of quilt
Backing fabric


The stripes on the front of the quilt were machine quilted above and below each of the divider bars.  I love how this quilt turned out!

The second lesson I learned was about using quilt labels.  I don't use labels on many of my quilts as others do, but on very special ones, I do.  I think my biggest fear is that the print on the label will run when the quilt is washed and as the last thing that is done prior to gifting the quilt, a ruined label will also ruin the quilt.  But I wanted to label this particular quilt.  We were invited to a birthday party to celebrate the 90th birthday of a very special lady named Rose.  I was at a loss as to what to give her as a gift and I knew I had less than a week to decide, but I ultimately chose to make a lap size quilt.  I found the perfect fabric in my stash and the count down clock started!  The quilt was made using the "tube method" which I will describe in the next lesson learned.  It went together very quickly.  The fabric used for the borders was a surprise find in my stash - all roses!  Once the quilt was finished, I decided to add a special label.  I knew I needed to practice to find the right words, the right ink and the right method of adhering the label to the quilt.  I found a printable frame on line and tested it with iron-on paper and several inks.  I finally found a combination that worked.  The quilt was completed on time and was loved by the lady for whom it was made!  I see more labels in my future!


The last lesson I want to tell you about is tube quilting!  This technique was used to make a quilt for the sister of the little lady who loved "howls".  As it turns out, I had a quilt kit in my stash that was just perfect for her.  It came with all the fabrics and the directions instructed me to cut strips from each of the appropriate fabrics and then sew them together to make a large strip set.  With the tube technique, the sewing is done first, then the cutting follows.  The sides of the strip set are then sewn to each other right sides together to make a tube.  The tube was then cut across the top of the strip set to create multiple loops.  In order to get the pattern to cascade, you need to find your friend Jack (the ripper).  A seam between a different fabric loop is then ripped to create a flat strip again.  These strips are then sewn to each other to create the quilt top with a cascading pattern.  Add borders and backing and the quilt is done.  

I love this technique (Rose's quilt was made using the same technique).  This method is more time friendly than sewing 64 blocks together!  You can find a similar pattern called Streaks of Sunshine on the quiltville.com website.  

Here's how the quilt front and backing turned out:


I hope you enjoyed reading about my adventures outside the box!  Comments, as always, are welcome!


Sunday, June 17, 2018

APQ 2018 April UFO


No blood was shed in the making of this table runner!

This is another UFO that is now a FO!  I started this runner in a quilting class at the Quilter's Barn in Allentown, NJ, which is no longer in business.  I was very sad when they closed.  I loved taking classes there because I made many new friends, I learned new techniques and tips about quilting.  Oh, I did find new shops where I can spend my dollars and take classes, but as the saying goes, you never forget your first.

So this class was taken in 1996.  I was a fairly new quilter back then but I do remember that I liked this class because I was scared silly to sew squares on point and this was the perfect project to cure me of that fear.  I finished the top center with the squares on point while in the class, but as often happened with class projects, once it left the classroom, it was put in a bag, box or bin never to be seen again.  I have gotten much somewhat better since then but there is now a spiral runner that comes to mind!

I added this to my UFO list to finish in 2018 with all expectations of completing it.  It was a smaller project, I had all the supplies on hand, I was getting better at quilting my own smaller projects, I also learned the joys of spray basting!  I don't know what I will do with the thousands of bent safety pins I have collected over the years, but I will find something creative on Pinterest I am sure!

Finishing the top required adding the little yellow border and the wider print border, all straight stitching.  Then the top was sandwiched with the batting and backing with the basting spray.  Lastly, I made the 2.5" binding and attached it to the front of the runner with a .25" seam.


I had purchased a sizeable amount of Clover clips over the years but still used straight pins to hold down the binding on the back side of the project.  They worked great but I routinely pierced my hands and snagged other fabrics before the hand sewing of the binding was done.  This meant blood and band-aids were part of my quilting practices.  This time, I put away the pins and grabbed the clips.  My binding habit was to pin (or this case, clip) the binding down on all four sides before starting the hand sewing.  See the result below - no pins, no piercing, no snags!  This technique is certainly a do-over!  This dog learned a lot of new tricks with this small project!


I try to use each class project, including those hanging around for 22 years, as a learning experience.  So here is what I learned from this one: 
  • If at all possible, purchase all the fabrics you will need to complete a project.  Of course this could be costly if your project is a king sized quilt, but when possible, get enough to at least make the borders and binding.  I bought all the fabrics for the borders and backing and even the binding for this runner, and I was glad I did.
  • Learn a new technique that will reduce your time sewing, machine quilting or binding your project.  
  • It's ok to leave a project unfinished but keep them together in a labelled box or bin.  If you decide you don't intend to finish it, recycle the fabrics into another project such as a scrap quilt.  Some guilds will also take UFO fabrics.  After all, it will give you more room for new fabrics and the UFO fabrics will be put to another good purpose.  All will be well in the quilting universe!  
May all your needles be sharp and your bobbins be full! 


Friday, May 4, 2018

APQ 2018 March UFO

Even though the number selections for the APQ UFO challenge for 2018 are totally random, I seem to be on a holiday themed run and this month was no different.  This is a Halloween project that was started in mid 2006.  It was a little kit I picked up during the annual NJ Shop Hop.  The pattern was provided in the kit which was the primary attraction for me.  Once I opened the kit, I saw that the fabrics were all Halloween themed which was ok in my book.  The kit also included the fabric for the top, borders, and binding.  I just needed to add the backing fabric.

The pattern name was "Frame Up" and was one of the little laminated cards you often find near the cash register in many shops.  I liked that it was a simple project and I that I could shop at local quilt shops.  This one was in Ocean City NJ and unfortunately, closed over a decade ago.


The project was easy to assemble with the fabrics provided.  I used a small piece of backing fabric from my stash to back the runner.   I used double sided fusible batting to sandwich the fabrics since it was a smaller project.   I machine quilted it using my walking foot with a quilting arm to make the stitching widths consistent.  I took the opportunity to practice my machine binding with a decorative stitch rather than hand sew the binding down.  I like using smaller projects like this to practice some techniques that I otherwise can't do on larger projects.  This runner finished at 14.5" x 36".  I look forward to using this Halloween runner in a few months.  The pattern is very small but will certainly make a big impact in some of my stash fabrics for other holidays!  


Can you guess what UFO project for April was chosen???